
Appearance
Accounts Receivable Module
Table Of Content
Overview
The "Expected" panel located on the left-hand side of the screen provides a comprehensive overview of all the financial aid associated with the student's account, including upcoming, past due, and pending aid.
It is important to note that if the student does not have any financial aid, the "Expected" panel will not be visible.
On the other hand, the right-hand side of the screen displays the student's AR (Accounts Receivable) information.

Payment and Charge Processing
In the Accounts Receivable section, you can manually post payments and charges to a student’s account.
🟥 Posting a Payment
To post a payment, go to the Payments side of the screen and click on “Add Payment” (red line below).
⬛ Posting a Charge
To post a charge, go to the Charges side and click on “Add Fees” (black line below).
🔧 Setting Up Codes
You can define your own codes for both payments and fees:
Payments: Go to AR → Setup → Payments
Fees (Charges): Go to AR → Setup → Fees
🎓 Example: Tuition Adjustment (Scholarship or Discount)
Go to AR → Setup → Fees and create a new fee code (e.g., Tuition) if one does not already exist.
Open the student's profile and click “Add Fees.”
Begin typing Tuition in the search box. The system will auto-suggest matching fee codes.
Click on the appropriate fee, and a new line will be added.
Enter the description (e.g., MTI Graduate Scholarship), date, and a negative amount (e.g., -1340) to reflect the discount.
Click Save. The system will post the adjustment to the student's ledger.
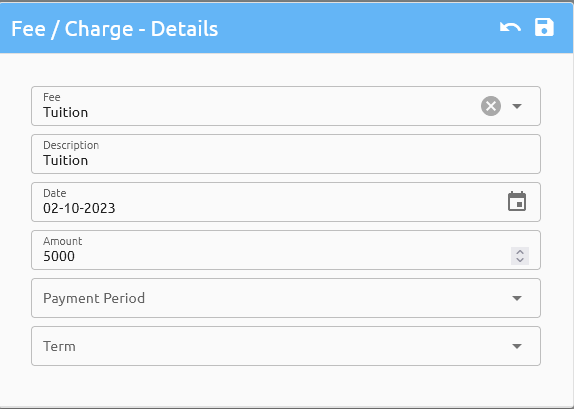
💰 Example: Tuition Charge
Again, click “Add Fees” and search for Tuition.
Update the description (e.g., Digital Film Program Cost – 2nd AY).
Enter the amount (e.g., 8000).
Click Save. The student’s Ledger Card will now reflect the charge.
Auto Billing
Billing Assessment
Refunds
Auto Refund
Entering Refunds
Go to Account Ledger Card:
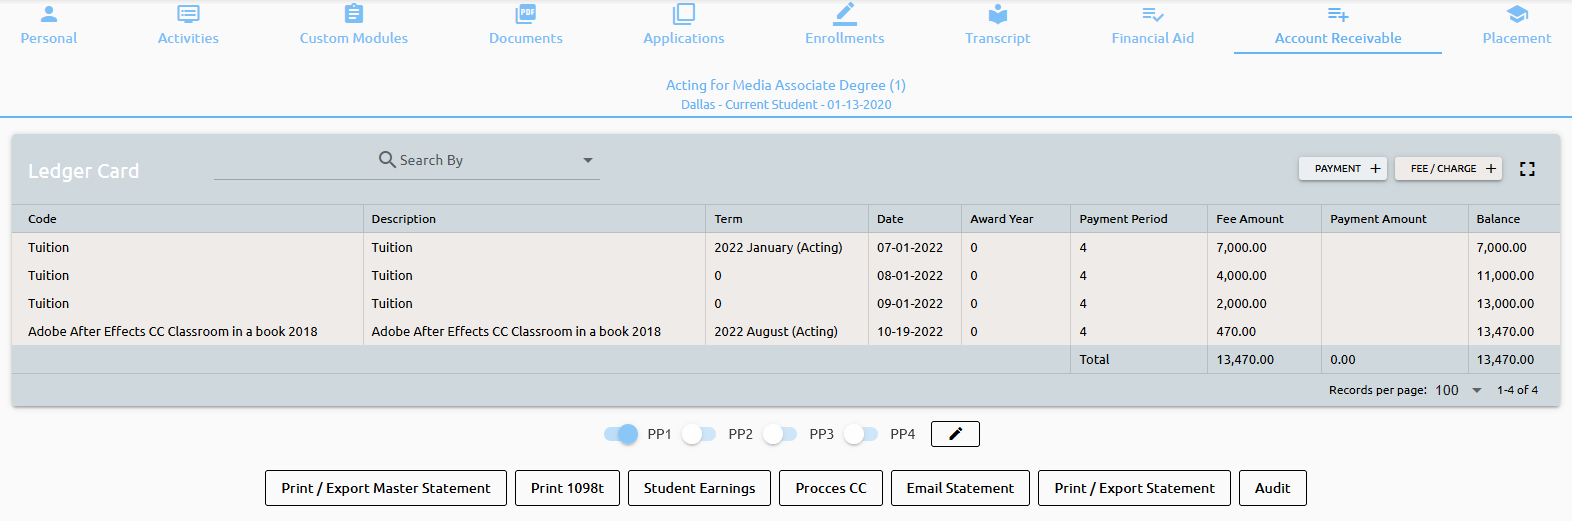
Click on "Payment":

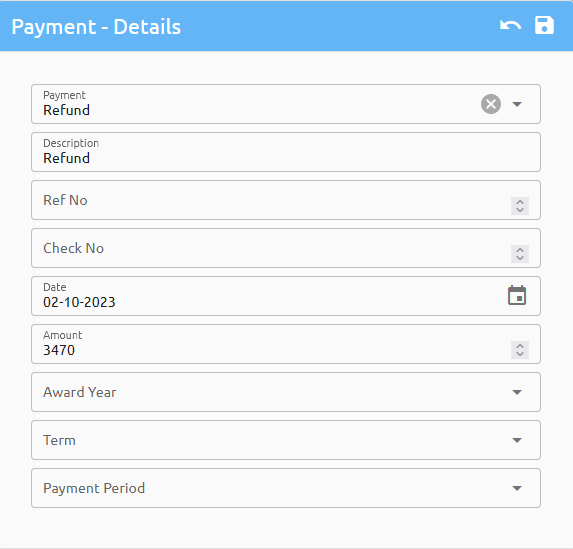
Select the transaction, fill out any of the below information you have and save:
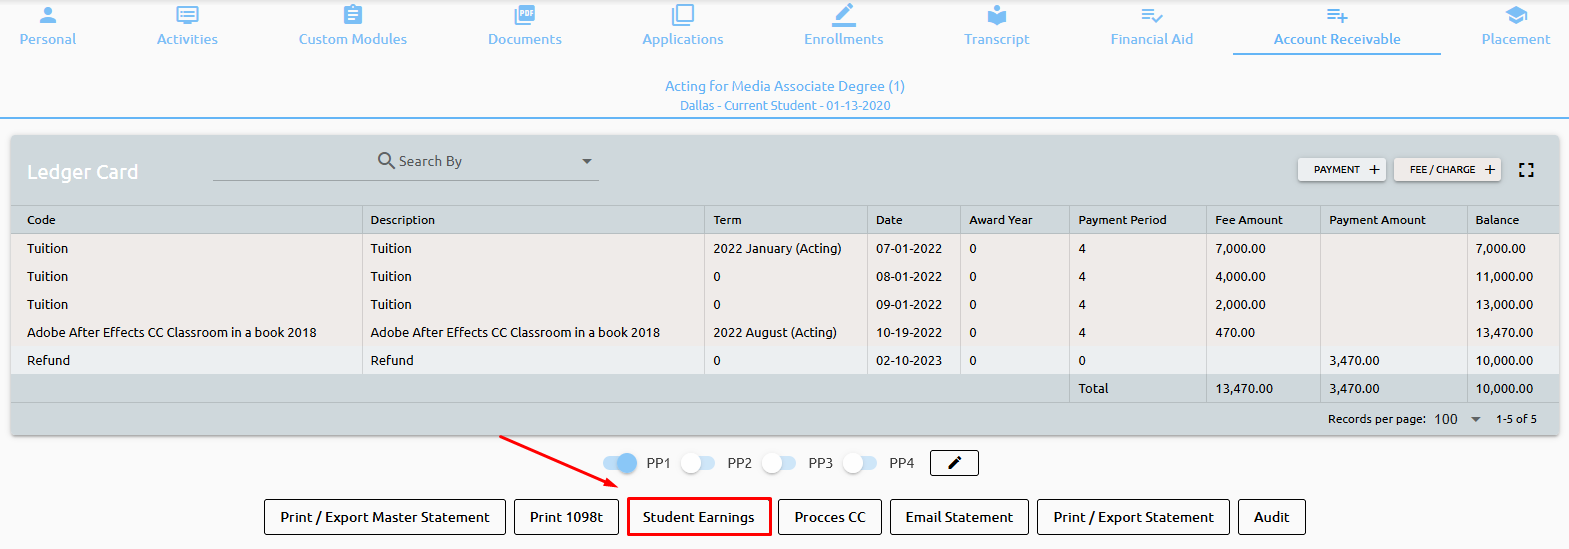
The system adds the transaction to the Ledger:

Month Lock and the Reversal Process
The Month Lock functionality allows administrators or designated personnel to close a specific accounting period or month in the system. Once a specific month is locked, the system restricts further modifications or changes to financial transactions related to Student Accounts for the locked month.
Posting and Updating ?
Payments
Posted Payments
To review Payments that have been posted in Campus Cloud, navigate to AR>Posted Payments:
Select the Campus or All Campuses:
Select the Payment(s) you are looking for:
Finally, select the Transaction Date:
And click Calculate:
This list can also be Exported:
Now, if the institute used QuickBooks - the Payments that have been Posted to QuickBooks under AR>Posted to QB can be can be reviewed.
Making Payments Unpaid
Fees/Charges
Updating/Moving Transactions
Search for a student and open the ledger Card. Scroll to look for the transaction and click on it. From here:
- Exclude the transaction from QB
- View the transaction history by clicking on Audit
- Edit the transaction by clicking the pencil in the top right corner
- Delete the transcation by clicking on the trashcan in the top right corner
- Move the transcation to another enrollment
- Do a Month Lock Reversal
![]()
Revenue Recognition and Earnings
Every time a student is enrolled, the system will create the Students Revenue card:
Open the ledger window and click on Student Earnings:
New screen will pop up with Students revenue card.
The system calculated Payment Periods, Start and End Dates, Earning Days and how much will be earned daily:
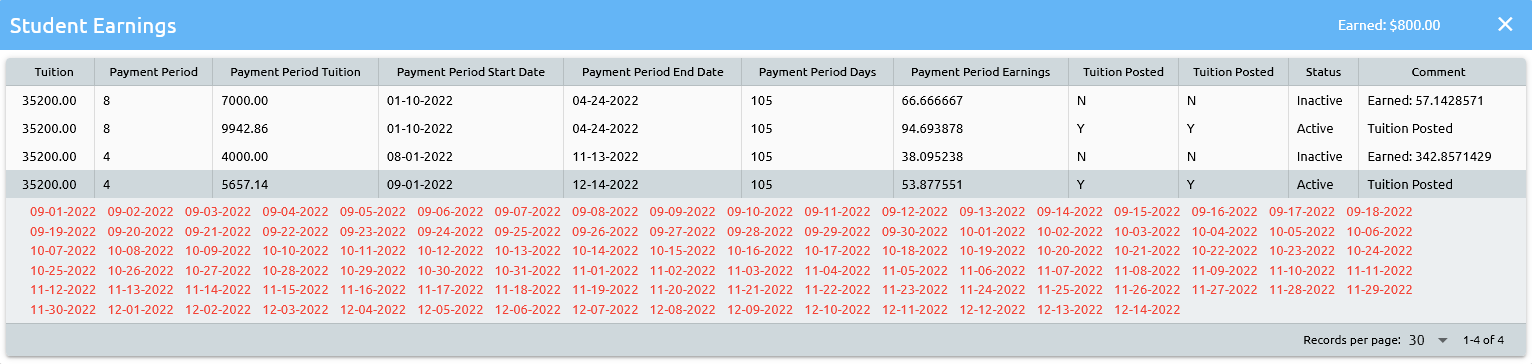
When tuition is posted to a students account, the system will calculate and add all the dates that student will earn:
Now, by clicking again on STUDENT EARNINGS, the system inactivated initial setup for PP 1 and created a new one.
Reason for it is that we posted tuition on 05/24 and system initially calculated that it should be posted on 05/02.
System readjusted earnings per day and marked tuition posted for that payment period and added all the days that student will earn.
Red dates means not earn, green dates mean earned:
For configuring the Revenue and earnings two setups are required, go to AR Revenue Recognition and Earnings:
Revenue Recognition
This is the part where we tell system to EARN.
Pick the Campus and Month and click POST:
Once posted, all the days belonging to that Month, Year and Campus will marked as Earned (Revenue Recognized)
Earnings
View what is earned, deferred, and Forecast.
Just pick a month and the system will show what is earned for chosen the month (blue), two previous months, Deferred (Unearned) and it will forecast earnings for the next three months (this is what can be expected):
Clicking on the blue amount (current month), new tab will open with the details of what was earned for that month and that campus:
Clicking on any the amount new tab will open with earning details for that student:
Sponsor
Sponsor is the ability for an organization or another person to take over a student's bill.
👉 Click here to learn how to setup Sponsors.
When adding associated fees and charges to an account within the date range - Sponsor checkbox appears:
Transactions not identified in the agreement or outside the date range do not have the agreement checkbox:
Review the Ledger button to see all of the transactions moved to this Sponsor:
Please keep in mind the month lock process:
Payments and/or Fees can be made from the agreement or directly on the student record:
Import
Sterling Daily Transactions
To import Sterling daily transactions use the menu item AR>Import>Sterling.
Click on “Choose File”, select sterling CSV file from your drive and click submit:
New screen will open with details for all transactions from the file:
Merge method shows if student was found (by Old or New ID) in the system or not. All matched students will be automatically selected for posting.
By clicking on transactions we can check or uncheck specific transaction for posting. Also, we can click on Check All / Uncheck All.
Clicking on POST will post all selected transactions to student ledger cards.
As a added feature, all CSV files are saved on server as well, so you don’t have to keep copies on your hard drives.
Transactions into AR
The 'Import Transactions' module can be found under AR>Import:
Basically, build templates, telling the system what goes where for different importing needs.
Start by creating a new template:
A new form will pop-up:
Enter the name for this template and where should it post, to the "Payments" or "Charges" side of the AR.
The system already prepopulated required fields with suggested column names, however, feel free to change the field names to match your CSV file that will be imported, for example:
Or
If the importing file doesn’t have an Enrollment Number, check the “Last Enr. No” box and the system will apply all transactions from this import to the most current enrollment, in which case that field doesn’t even need to exist in CSV file.
To import all transactions as of Today, disregard the “TRANSACTION DATE” field and check “Today”.
To add other fields, please choose from the “Add Fields” drop-down:
In the example below, we've added two more fields: Check Number & Award Year:
For following Template example:
Our CSV file should look like:
With data:
Mind you that the Student ID, Enrollment Number (if used), Transaction Codes (in case above TRX Code) and Term Codes must exist and match in Campus Cloud.
Also, if working in Microsoft Excel, make sure to save the file as a CSV and not as a CSV UTF-8:
To import transactions in Campus Cloud, click on the template and then on the Import button:
Select the file to import and click Preview:
The system will compare the file that is being imported with the template; and in case the columns don’t match, the system will show an alert:
If all goes well, system will show a Preview:
In the example above, we see 3 errors, transaction code “DIRSUBWWW” and Term “2020 Fall Something” DO NOT exist in Campus Cloud and these 3 transactions will not be processed.
Fix those errors in the CSV file, import it again, and good to go:
Clicking POST, will post all transactions to AR:
Another thing to mention is that the order of the fields doesn’t matter, also, fields that are not on the template will be ignored.
Following file is perfectly acceptable:
Even though our fields are not in the same order we created in our template, it will still work and two fields (SomeField & NewField) will be ignored while importing.
Export
QuickBooks
1098T
To process 1098T's, first setup the 1098 fields.
Navigate to AR>Setup>Payments:
Select those payments which will impact the 1098T processing:
Edit the payments and select the appropriate 1098T flag, if it should go on the 1098T and then 1098T Grant if it should go under the 1098T Grant box:
Once the payment transactions have been setup navigate to AR>Setup>Export, select either the 1098T Short or Full Report:
For the Short Report select the year and click submit:
Once the system is complete click the "export" button:
The system will produce a short file of the 1098T data, ssn's have been eliminated in this example:
Select the Full report and select the Campus and year to run the report for and click on submit:
Once the system has processed click on "export" The system will produce the FORM1098T which can be saved or opened with a text editor:
The file is in the format which can be submitted to the IRS and a 1098T printing processor.