
Appearance
General Modules
All Campus Cloud modules that are applicable for all your departments can be found here.
Table of Content
Group Builder
Under Maintenance>System>Group Builder you can apply certain actions to groups of students.
First, start off by clicking "Add Record" (reminder-not done in v2). From here you enter date ranges for Start Date, LDA, AG Date, Grad Date, Drop Date, Source Date; leaving them blank will select all dates:
reminder-pictures
You can also select multiple:
Statuses
Degrees
Sources
Admissions
Campuses
Programs
Drop Reasons
Sessions
Courses
Agencies
Funds
Custom Fields
Press the "Show" button and the system returns a list of the students that meet the filter criteria. Click the 'Add' button to create your group.
From here checkoff any students as needed:
Now, choose to send an SMS, Email, or add a Communication Plan to that group of students:
Custom Fields
WorkFlow
Inventory
Holds
reminder-pictures
Each department has their own set of holds that can put students on.
👉 Click here to learn how to maintain a setup.
Each enrollment can be placed on Hold.
Select reason from dropdown and click on “On Hold” button:
If student is placed on Hold, top bar will turn red as well as specific enrollment.
System will create new Activity with HOLD Reason, Date, User who placed student on hold and Department:
Once student is ON Hold, “Off Hold” button becomes available:
Clicking on it, system will remove student from “ON HOLD” list and add new Activity:
⚠️ Warning: If Enrollment check box is checked under the setup, the system will not allow a "New Application" once placed on this hold, therefore the student is restricted from a new enrollment
If you try clicking and creating a "New Application", this pop-up shows restricting you from creating a new application:
Variables and Available Fields
We have Variables for Letters and Emails that are hard-coded into the system. Those VAR can be found under Maintenance>System>Available Fields:
They are divided into eight tabs:
- Students
- Enrollments
- Tuition
- Promissory Notes
- Tuition Finance Plan
- Campus
- Data Collection
- Miscellaneous variables.
These variables cannot be setup, but if needed, additional VAR can be requested.
Under Maintenance>System>Variables is where you can setup your own variables, that are not tied to individual students and DO NOT change:
Down below you will see my Test Variable:
I’ve also created a test letter, to help explain thoroughly:
At the bottom you will see the 'TEST' Variable we created previously.
Now, for example, go to students record and click on 'Print Letter':
A PDF file opens, fills in the Students information in the 'Available Fields' and replaces your 'Variables' with what has been setup:
Document Categories
Learn how to maintain confidential information on certain students by department.
In the Documents Categories Setup (Maintenance>Custom>Document Categories) there are two additional filters – Departments and Positions:
reminder-pictures
These filters will help to better determine which Departments and/or Positions can view specific documents:
Now, depending on the users permissions, additional Departments and Positions can be added, as well as removed from the filter here:
If the user does not have permissions, filters will be disabled, and edit category functionality will not be available:
By clicking on the downword arrow you can view the Departments and Positions tied to that document: reminder-review this sentence since it is not available in v2.
Finally, security for the Document Categories is under Maintenance>Users:
To maintain confidential information on certain students by department:
Just go to System>Users - select a user and go to the permissions tab:
Permissions to documents can be found under the users depatment -> Documents:
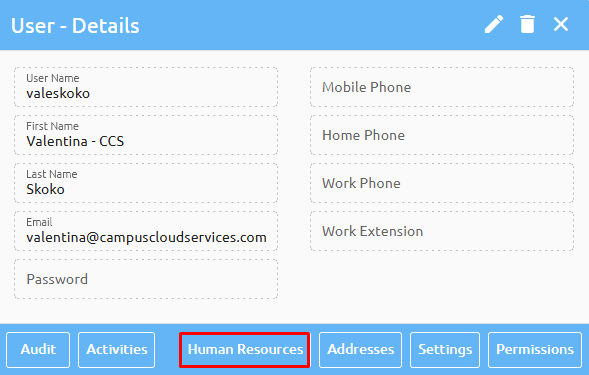
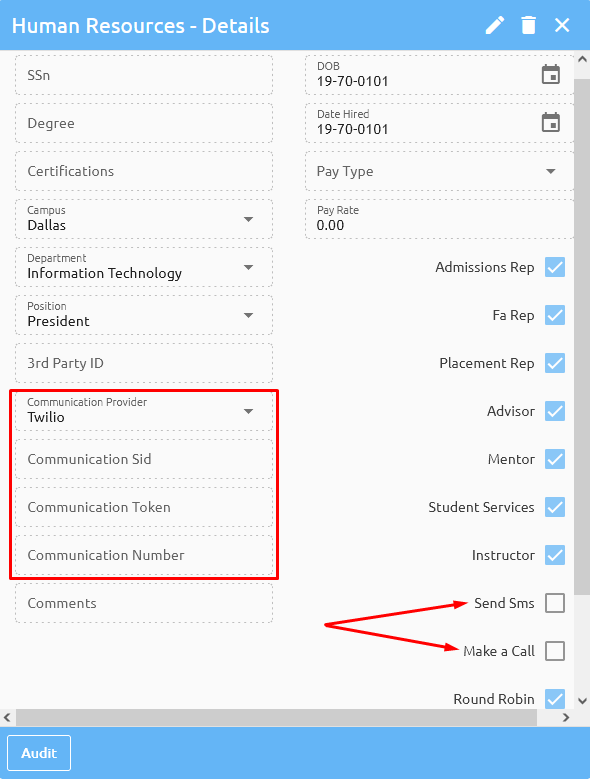
Setting up and using SMS
You can find your own Twilio number under Maintenance>System>Users>Human Resources:
Every time a new SMS is received, the system will show it in the Inbox.
reminder-picture + review, not sure how below works in v2
Replying to SMS or to create a new one, click on the New SMS button.
To create a new SMS, go to the Personal Info and click on the telephone drop down:
and clicking on the telephone number will open a new SMS window:
Enter the message and click send.
SMS can be sent to an entire class or certain members of the class by opening the attendance roster:
Selecting the student(s), the system will default all and identify any students who do not have a mobile phone, enter your message and hit send.
While in the INBOX and creating new a SMS, when the phone number is typed, as soon as you leave that filled, the system will show you Student name.
When message is sent system will add new activity with message body under that student record.
When you receive new SMS in inbox, system will show you who the student is associated with that phone number. In case the system can’t find that phone number, it will show just the number.
As soon as you receive SMS and system was able to match it to one of the students numbers, it will create activity under that student record with message body.
Same applies when replying to students SMS. It will build permanent communication trail under student activities.
Email Statistics
Email activities are marked with an envelope icon ✉️ on the far left:
By clicking on the email subject, in depth tracking details can be viewed for each email sent out:
The system tracks these following events:
- Queued
- Delivered
- Opened
- Clicked
- Temporary Failure
- Permanent Failure
- Unsubscribes
- Spam Complaints
Each event can be expanded for more details:
In addition to tracking individual emails, the Dashboard with email statistical data can be found under Maintenance>System>Email Statistics:
This summary chart summarizes all data for given date range. To get more data, hover over each chart, in the example below, we see that students opened 1,261 emails which is 58.2% of all emails that were sent out in the given range:
Sent chart gives the total number of emails that were sent for each day:
Failure’s chart shows emails with “undesired” outcomes. In the example below we can see that 1 student Unsubscribed which constitute 2.4% of all failed emails:
Main chart will list all events on a timeline, hovering over each event/point in time, more data will be given. In the example below, we can see that on 06/21/2021 we had one unsubscribed event:
Clicking on an event, the system will show full details:
Different events will have different details, for example “Temporary Failures” will list email subject, timestamp, student and user:
Again, clicking on each record will provide more details:
reminder-pictures
Report Builder
Give the report a name (no spaces), select Department or Position, & Save:
Select the table(s) & Save:
The Available Tables can be found under Maintenance>Custom>Available Fields
Add the Fields desired and any Sort & Save:
Add any Filters & Save:
The Script will generate on the SQL tab:
The look and layout of the report can be designed here:
Warehouse
For the Big Data reports (millions of records) we have a module called ‘Warehouse’.
Custom queries can be built in the Report Builder:
There is a button called “Store to Warehouse”. This will be used for extracting big data from Campus Cloud.
Once executed, system will compress report (zip) and store it to the warehouse.
This functionality is quite fast, for example, a report exports close to 5 million records, 570MB of raw data and compresses it down to 50MB for quicker download in around two minutes.
To download your warehouse data, simply go to System->Warehouse:
From here download the reports by simply clicking on their name or delete the files from the server by clicking on the trashcan: