
Appearance
👋 Welcome to Campus Cloud V2
Your go-to guide for mastering Campus Cloud — our powerful Student Information System designed to simplify your campus management.
This knowledge base walks you through key features, navigation tips, and customization options to help you get the most out of the system. Whether you're searching for a student record or setting up user permissions, we've got you covered.
📚 Table of Contents
- Key Features Overview
- Getting Started
- Navigating the System
- User Profile and Settings
- Locating a Student
- Users
- Roles and Permissions
- Audit and Logs
⭐ Key Features Overview
Campus Cloud V2 offers tools that simplify your workflows:
- 📊 Dashboards: Admissions, Financial Aid, Placement overview
- ⚙️ Custom Modules: Tailor workflows to your needs
- 📈 Reports: Pre-built and custom Report Builder
- 👥 Group Builder: Targeted communication & plans
- 📧 Email Statistics: Track campaign success
- 📝 Faculty Portal: Simplify grading and attendance
- 💳 Auto-Billing: Automate payments
- ✍️ E-Signature: Easy document signing
🚀 Getting Started
When you first log into Campus Cloud, you land on the Homepage — your command center for everything campus-related.
Quick Access Points:
- Top-left menu: Main navigation and features
- Bottom-left search bar: Find students instantly
- Top-right user menu: Profile, dashboard, reports, and settings
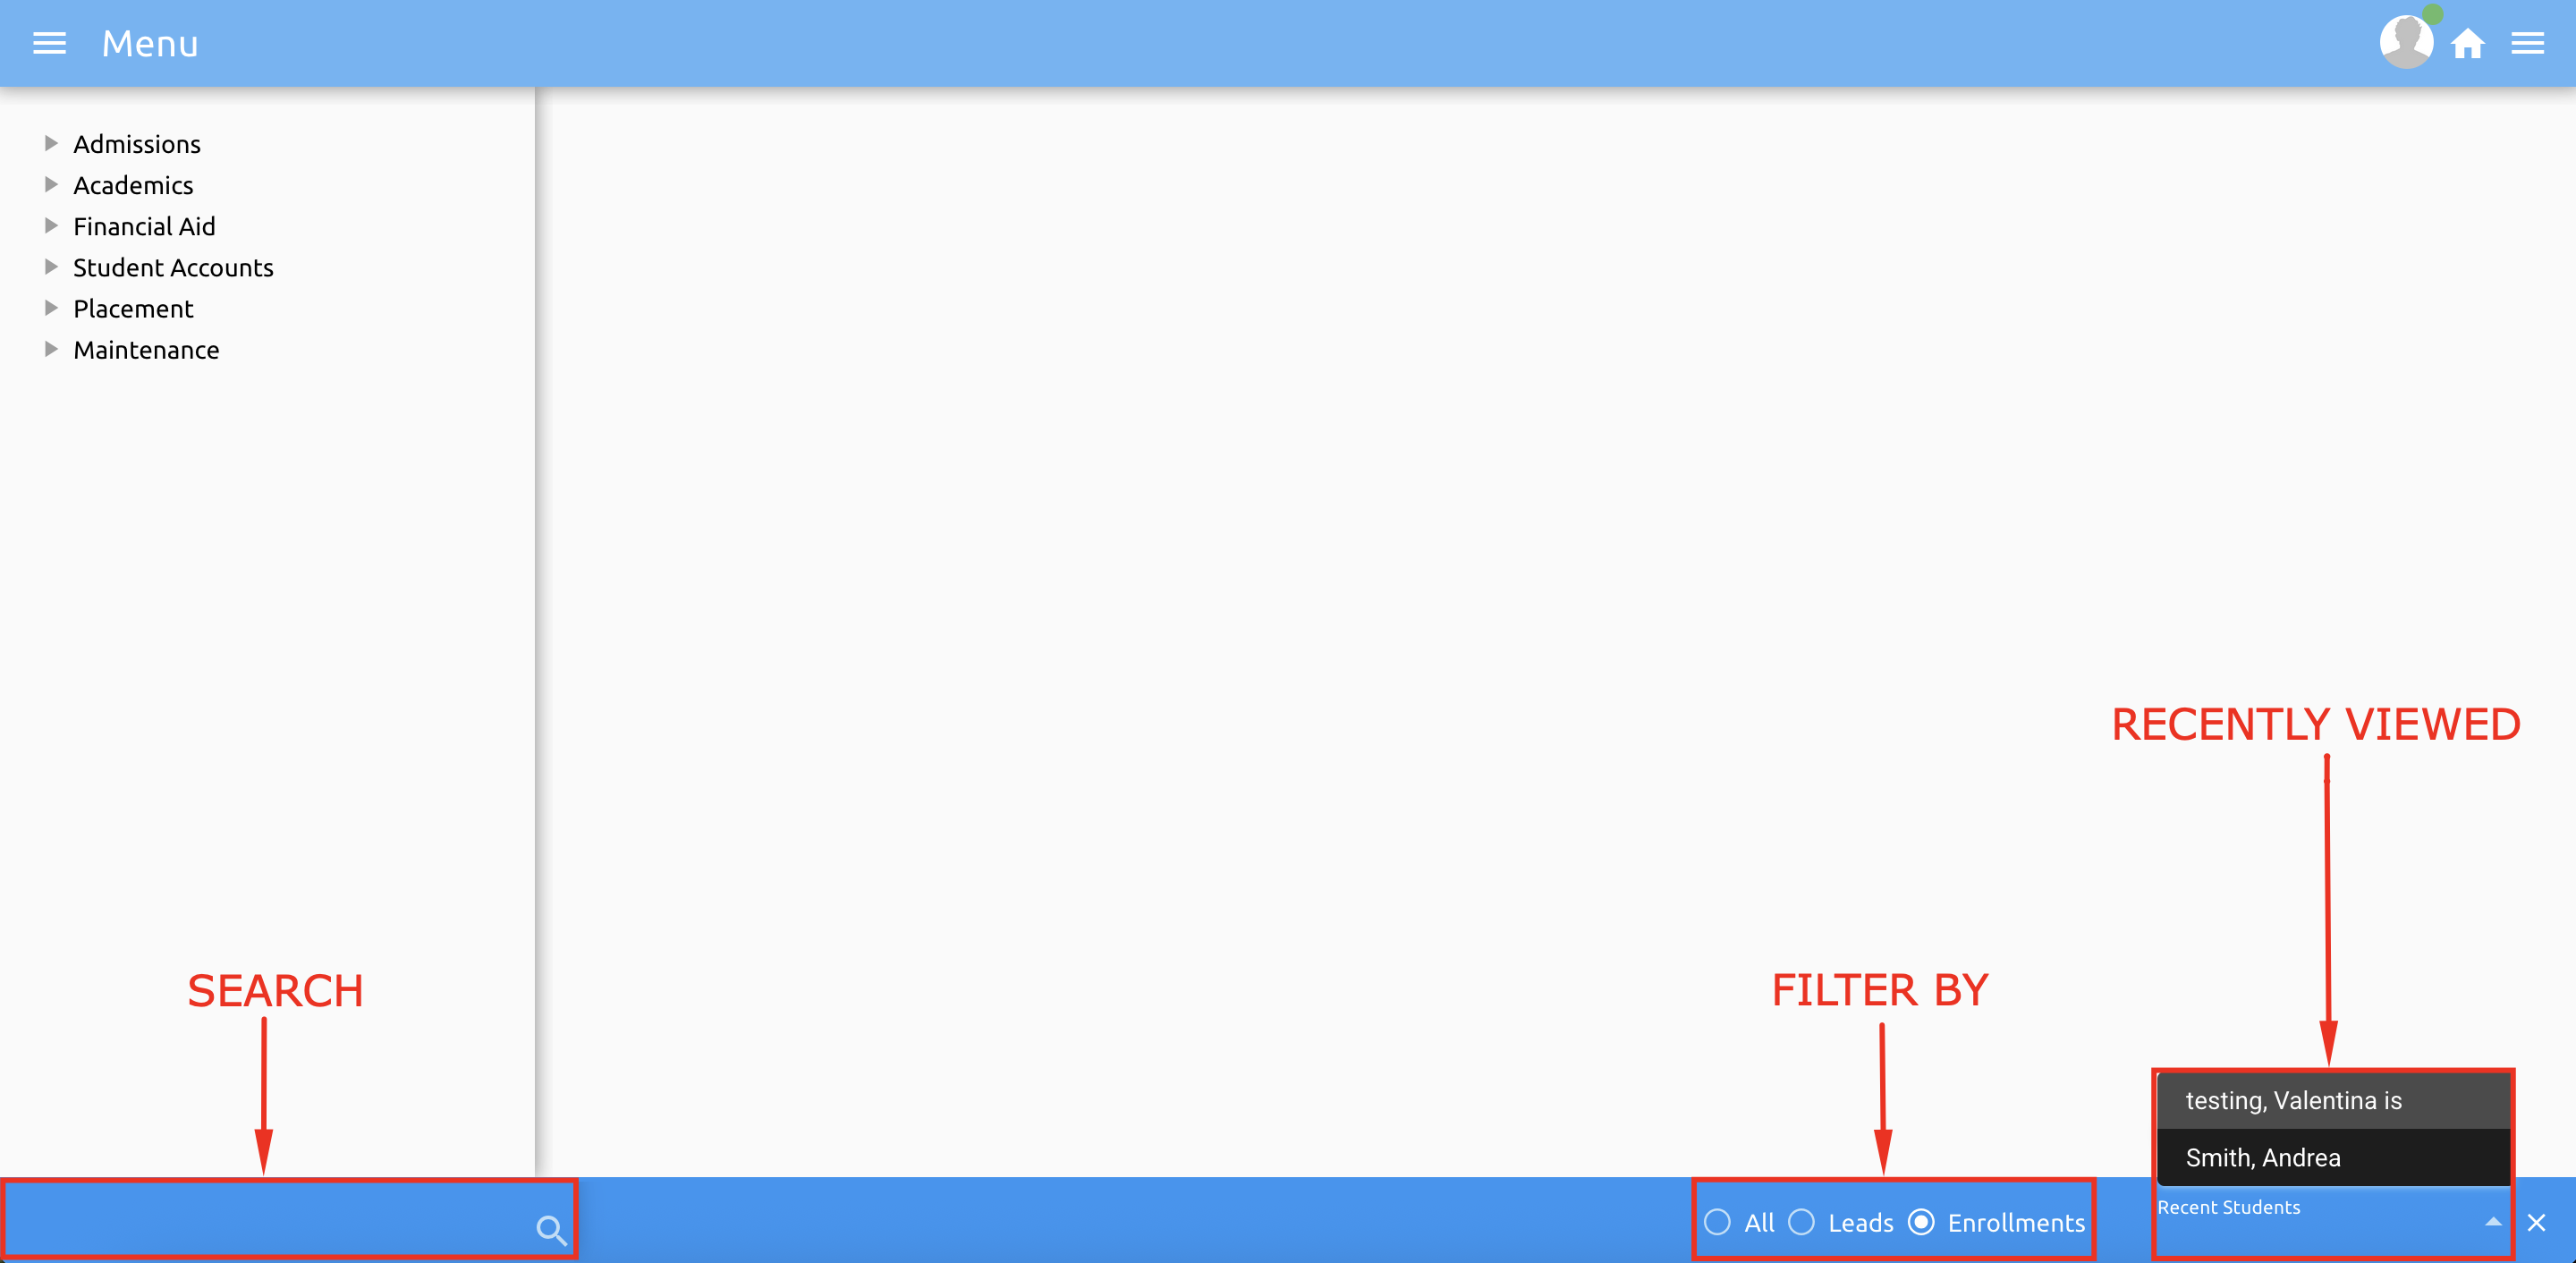
🖥️ Navigating the System
Our interface is intuitive and designed for efficiency:
- Use the search bar to find students by ID, email, phone, or SSN.
- Use filters to narrow by Leads, Enrollments, or All.
- Recent students are saved automatically for quick access.
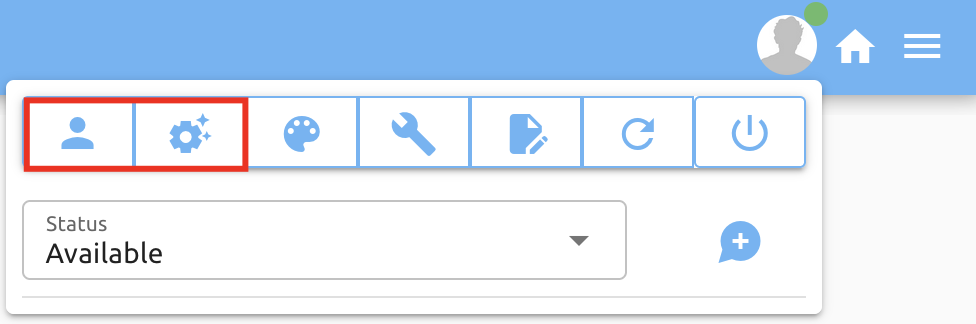
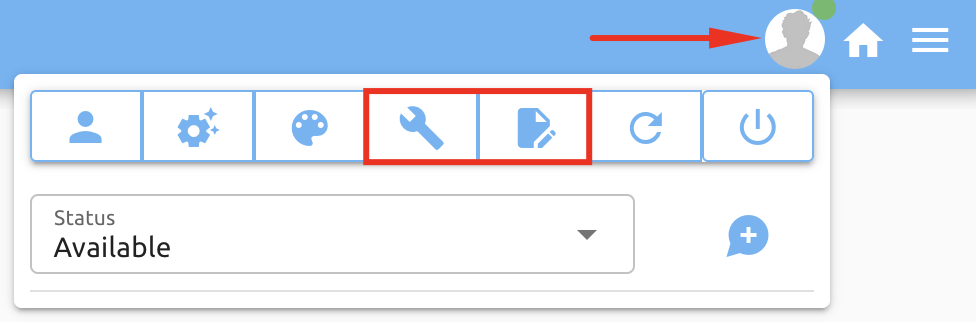
👤 User Profile and Settings
Campus Cloud lets you fully customize your account settings to match your preferences.
- The first icon is where your Profile is located.
- The second icon is where you can find your Settings.
📝 Profile
In Profile settings, you can:
- Update Profile Information: Change your account info and email address.
- Update Password: Use a strong, random password for security.
- Two-Factor Authentication: Add an extra layer of account protection.
- Browser Sessions: Manage and log out from active sessions on other devices.
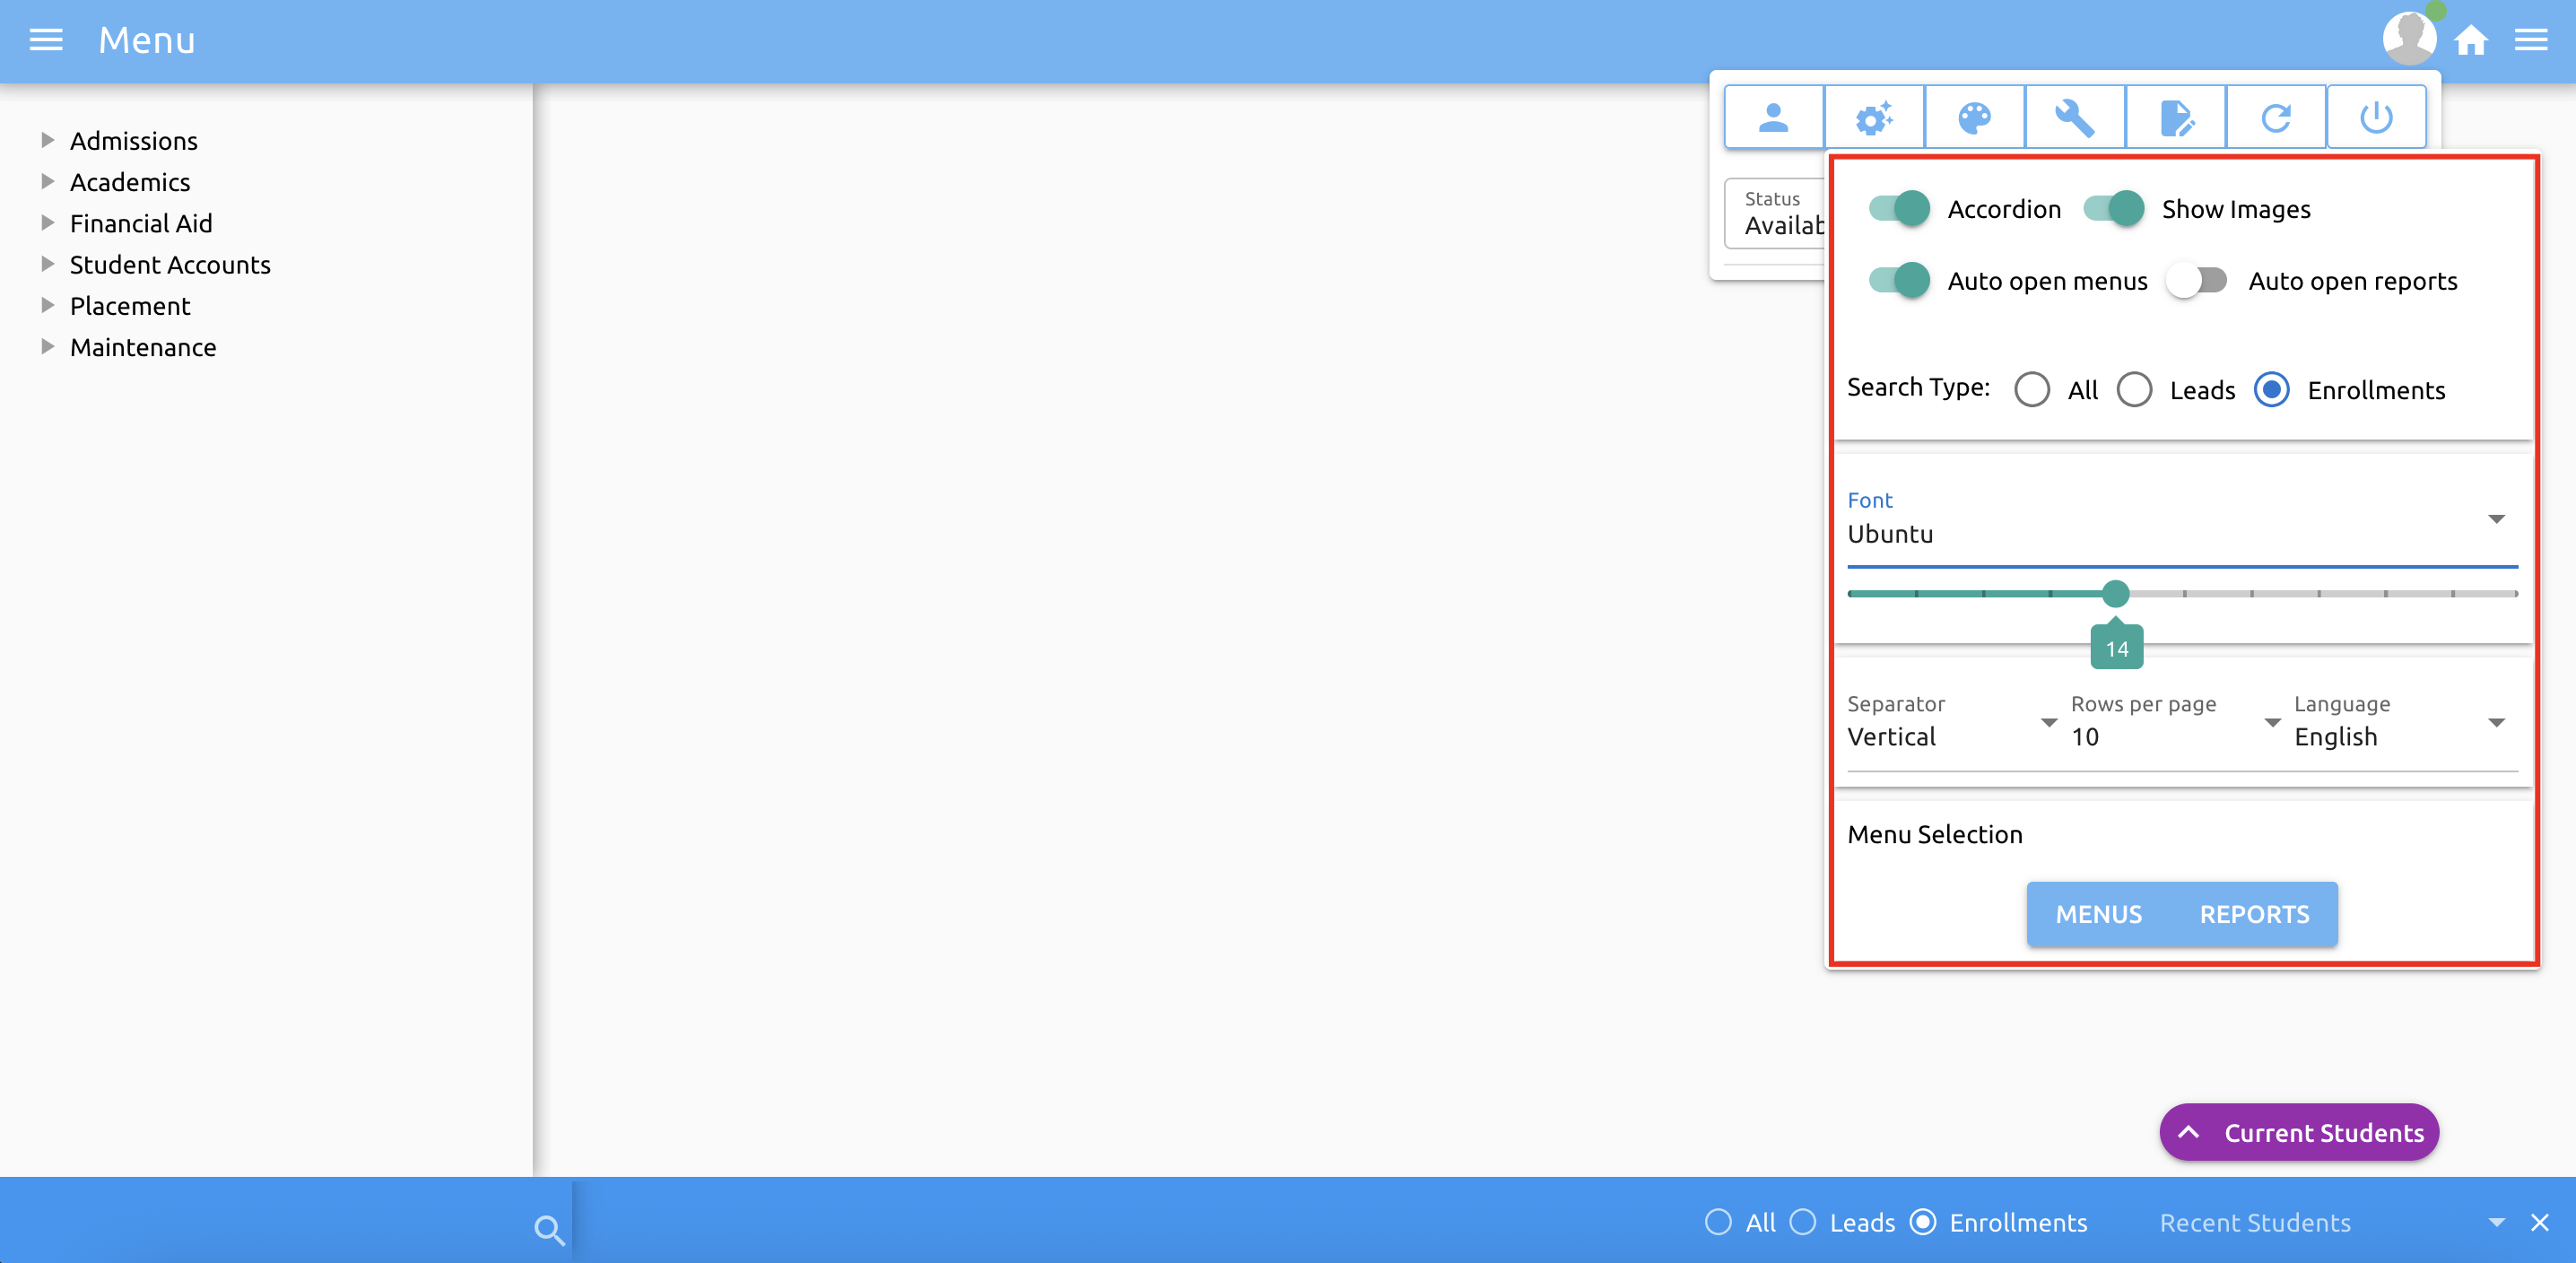
⚙️ Settings
You can personalize your experience with several handy options:
- Show Images: Toggle icons in menus for easier navigation.
- Auto Open Menus: Menus open automatically when you log in.
- Auto Open Reports: Keep reports open all the time if preferred.
- Search Type: Customize how searches work (same as the bottom-right search options).
- Font Type/Size: Choose your preferred font style and size.
- Page Customizations: Personalize separators, rows per page, and language settings.
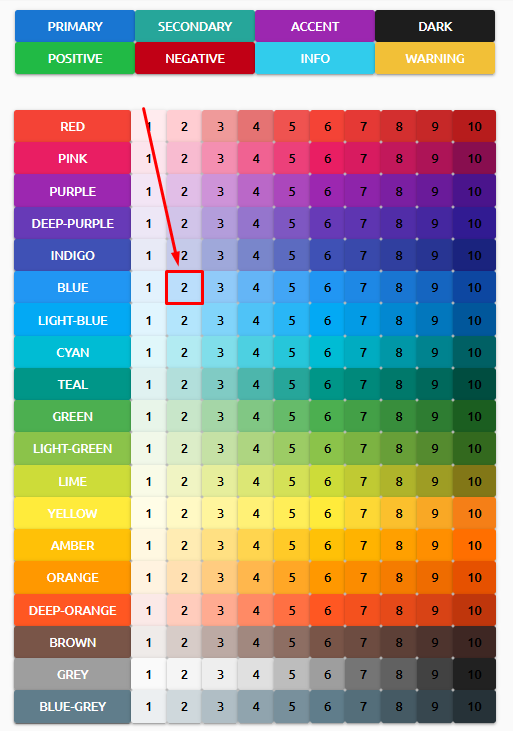
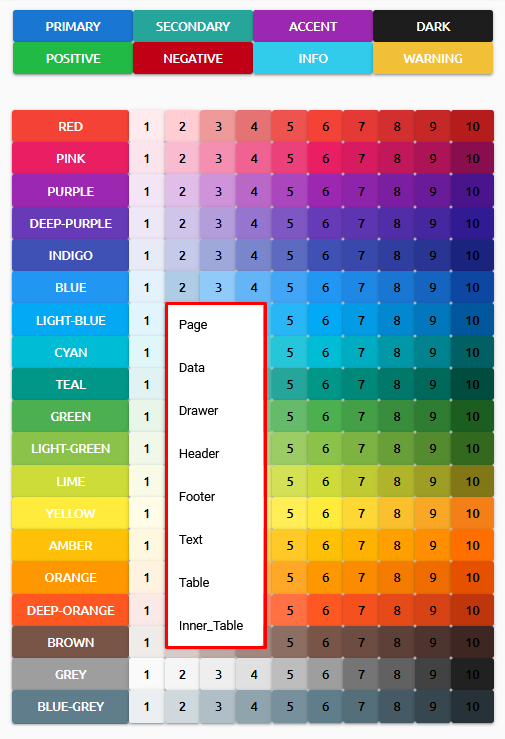
🎨 Color Scheme
Customize your account colors by selecting specific colors and indicating where each color should be applied.
🧩 System Setup and Report Setup
Customizing fields within menus is an important aspect of Campus Cloud that allows users to tailor their experience to their specific needs.
In this section of the platform, users can add, remove, and reorder fields within menus. This means that they can add fields that are relevant to their work, remove fields that are not needed, and change the order in which fields appear for easier navigation.
Overall, the ability to customize fields within menus is a powerful tool that Campus Cloud offers, providing users with the flexibility to adapt the platform to their specific requirements.
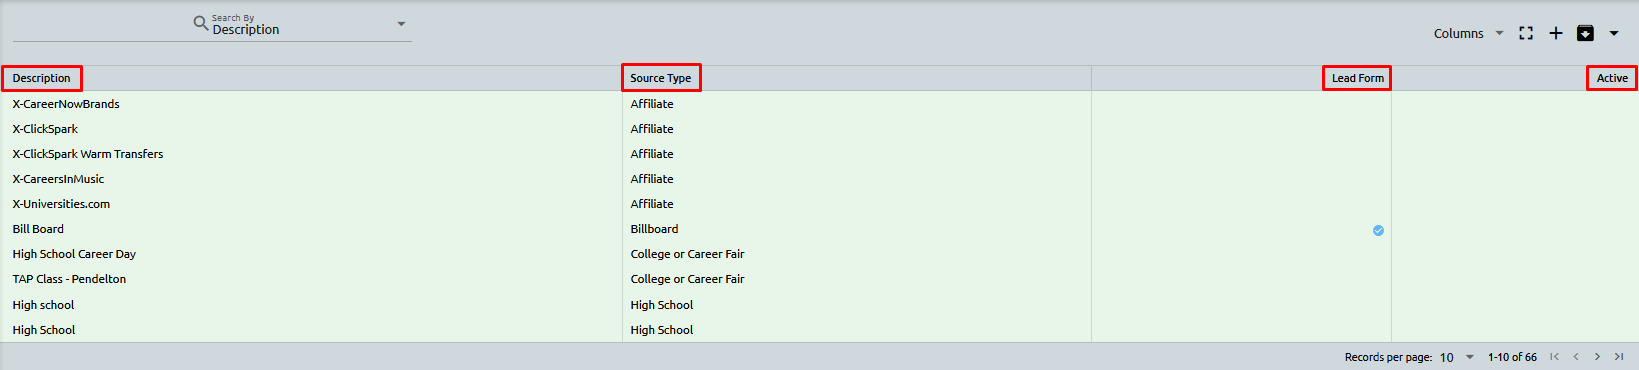
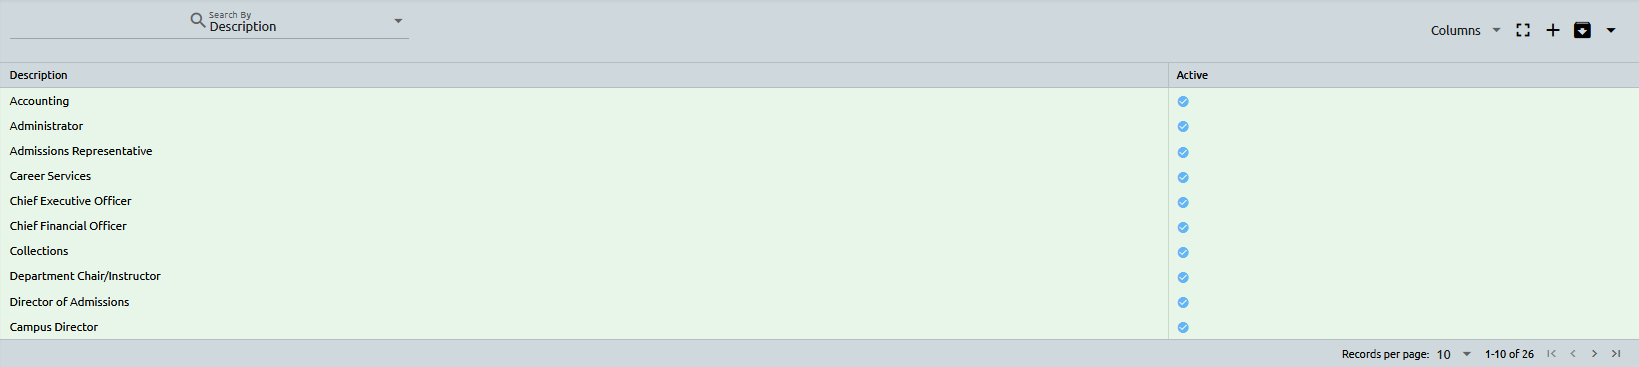
In this example, we will be customizing the Admission Source setup to display specific fields that are relevant to our needs. By selecting the Description, Source Type, Lead Form, and Active fields, we can create a more streamlined and efficient setup display.
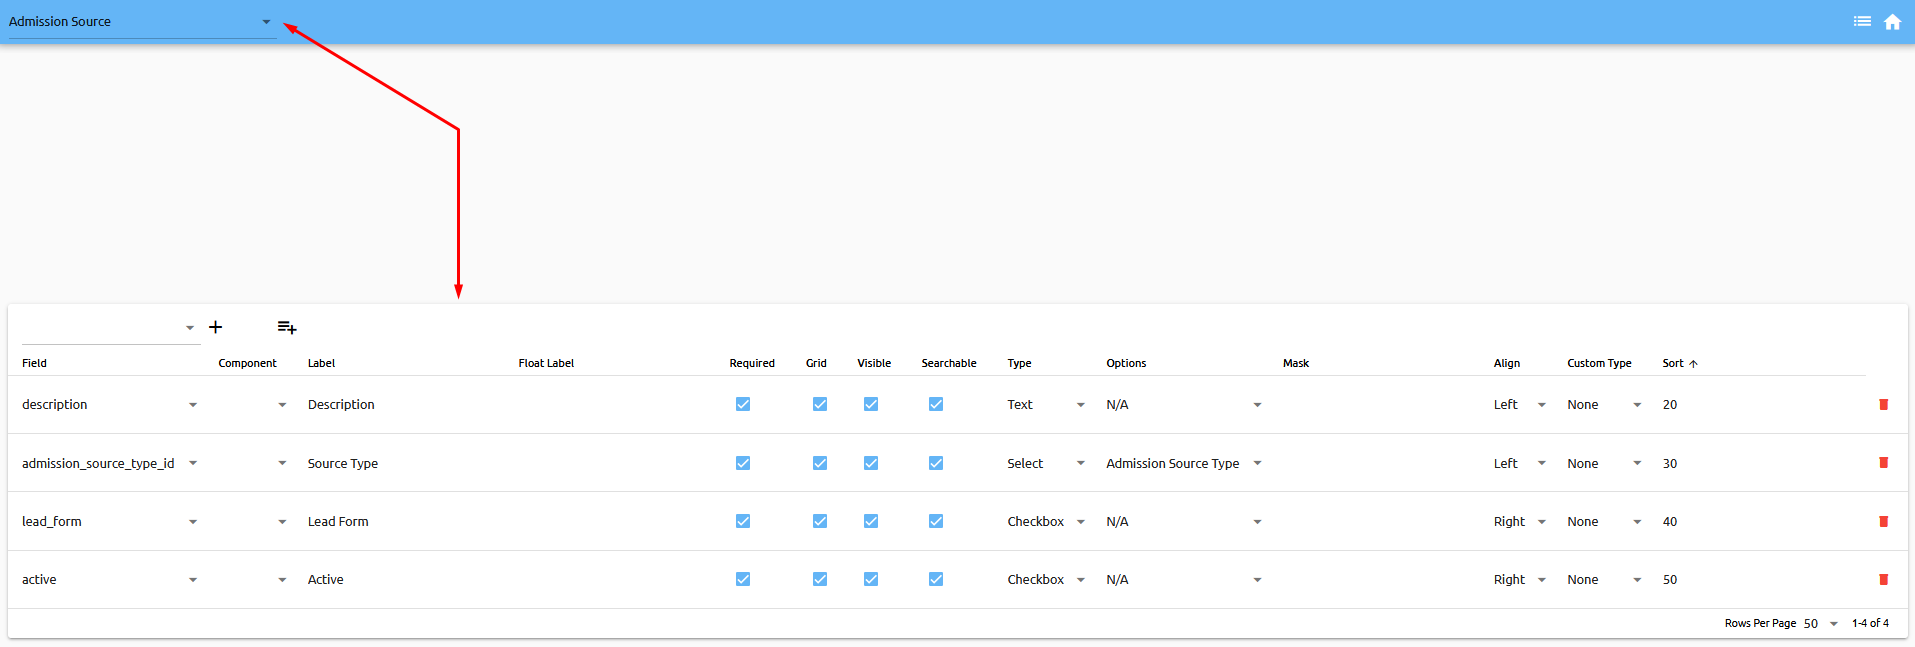
Once the fields have been chosen, the Admission Source setup will only show those selected fields, making it easier for users to access and modify the necessary information. This customization not only improves the user experience but also ensures that the setup is tailored to the specific needs of the organization.
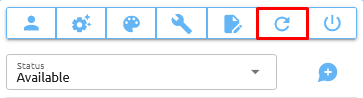
🔄 Refresh Page
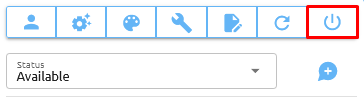
🚪 Log Out
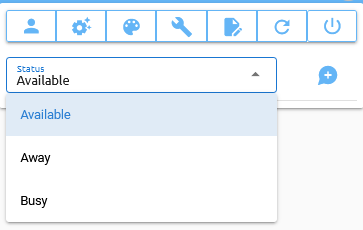
🔴 Status Indicators
- 🟢 Available
- 🟡 Away
- 🔴 Busy
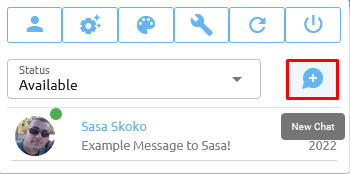
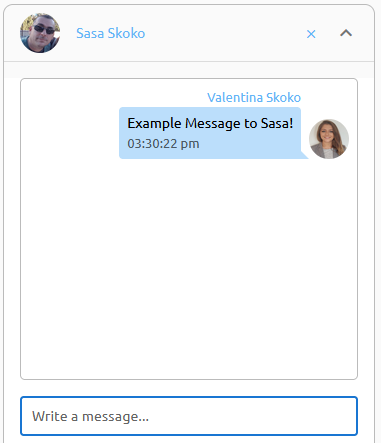
💬 Chat
View all chats and conversations at the bottom of your screen. To start a new message, click New Chat.
Type your message in the chat window:
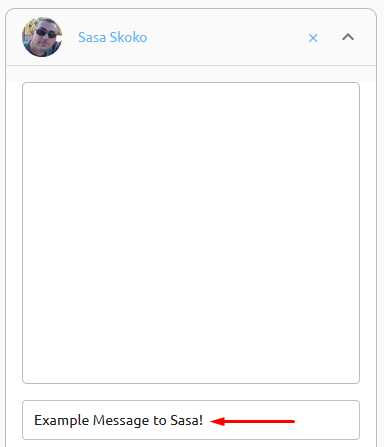
Press Enter to send your message:
🔍 Locating a Student
You'll find the search bar located in the bottom left corner of your screen.
Our platform offers a wide variety of search options, making it easy for you to locate a specific student. You can search by:
- ID number
- SSN
- Telephone number
⚠️ Warning: When searching by phone number, it's important to note that you should not enter dashes.
Once you've entered your search criteria, the system will return a list of students that match your query. To further refine your search, you can filter the list by selecting the following options in the bottom right corner.
🔘 All 🔘 Leads 🔘 Enrollments
Once the student has been located, simply click on them, and the system will open that student record.
💡 Tip: If you want to quickly find the student you're looking for, it's best to enter as much information as possible. The more information you provide, the more refined your list will be.
👥 Users
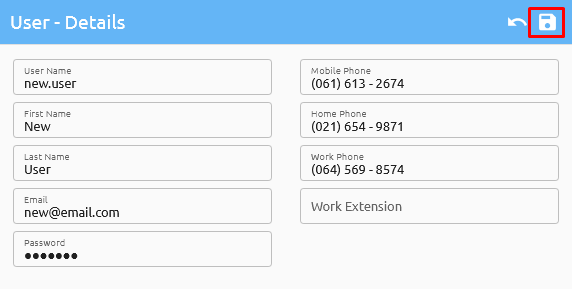
To add new users or edit existing ones, please navigate to Maintenance -> System -> Users. Click on the plus sign located in the top right corner to add a new user. Then, provide any available information pertaining to the user and save the changes.
By selecting a user, you can access their Audit and Activities logs, which provide detailed information about their interactions with the system. Additionally, you have the option to add and manage their Human Resources information, Addresses, Settings, and user Permissions.
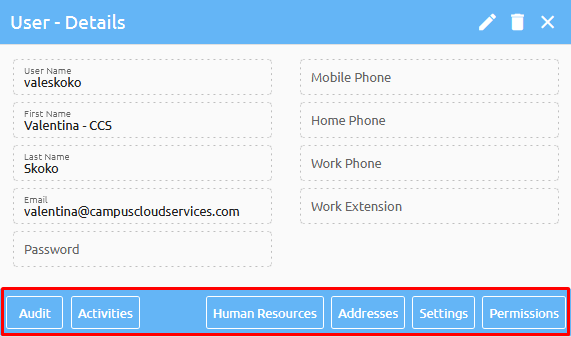
This allows you to tailor the user's access and functionality within the system to best suit their role and responsibilities.
🛡️ Roles
To configure permissions for all positions, navigate to Maintenance -> Maintenance -> Roles. Prior to setting up roles, ensure that the corresponding positions have been created under Maintenance -> Maintenance -> Positions. Once positions have been established, you can proceed with setting up roles for each position.
In the "Roles" section, you can define and configure permissions for each position. Simply select the desired position from the drop-down menu on the left-hand side, and choose whether you wish to edit the setups or modules for that particular position. From there, you can customize the permissions to reflect the user's role and responsibilities within the system.
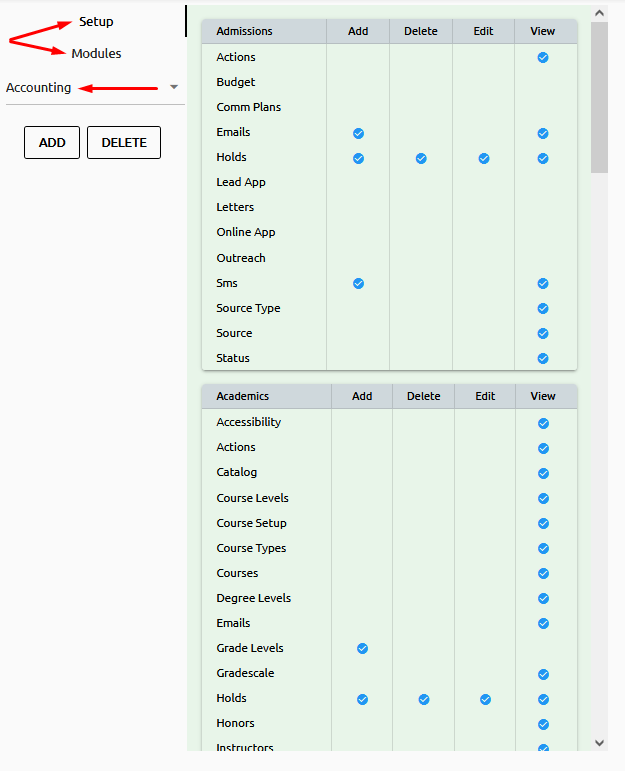
Once done, the permissions for each position will be applied to all users assigned to that position, ensuring that each user has the appropriate level of access to perform their tasks within the system.
📋 Audit and Logs
Track all user activities and system changes for accountability and transparency.
If you need help, our support team is ready to assist. Explore this knowledge base to unlock the full potential of Campus Cloud V2.